This blog post will show you how add your own custom ringtones from your Windows PC based computer onto your iPhone 7 using iTunes 12.5.2.36. I wanted to share this because it took me awhile to figure it out with all the outdated information out there, and I want to make it easy for others to do it. Enjoy!
What I used to accomplish this:
IPhone7, latest version of iTunes (12.5.2.36), mp3 formatted custom clipped audio bytes/songs. (I previously used “Audacity” to cut my songs into the parts I wanted for ringtones)
How I accomplished this:
- Add song(s) to your iTunes library that you want to use for ringtone(s)
- Go to your Songs portion of your library in iTunes, highlight the song, go to file –> convert –> AAC version


- Right click the AAC version (should be directly below the originally highlighted file, and then click “show in windows explorer”
 Change the file extension from .m4a to .m4r (you may have to enable the view for “file name extensions”) and YES you want to change it.
- Go back to iTunes, right click the AAC version and choose again to “show in windows explorer”; this time you should get an alert, saying it is missing, this is expected, choose to LOCATE

- Go into the folder where the newly renamed .m4r file is, locate and double click the file.
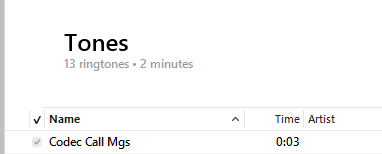
- It should now have disappeared from your songs library and automatically moved to your “tones”

- Sync your phone and you should notice the ringtone under tones.

 The ringtone I used for this example is a classic ringtone from Metal Gear Solid 4 which I have attached to this blog post! Try it out and let me know if you need any help.


Thank you! Your post is the only one that helped me make it work!
You’re welcome! Glad I could help. 🙂